Showing posts with label Tattered Angels. Show all posts

Tuesday, February 7, 2012

Heidi Swapp inspired mini

I've been addicted to Mycraftchannel.com's Create to Remember Channel. Heidi Swapp is the host of that one. Love it. She's got two videos that inspired this mini. Clip Frames and Back to Back Book Binding.

My Mini:


I purchased the frame at Ikea. It's called Virserum. It was only $2 and it's for 5x7 pictures. I used a bit Vintage Photo Distress ink since it was so white in comparison to the mini and wiped off the extra with a paper towel. I also distressed the mat and put a bit of scrap paper where the picture would be so when the album is removed there is still something pretty to look at. I did one change that I felt would work better for me.  Instead of hot glueing the clip on to the frame I ran a piece of Seam Binding through the frame and tied onto the clip. I could not get the clip to stay when I was playing around taking the mini in and out.  I tried not to make it too dimensional but I did add a few buttons and gems and I think that's the reason that It was so hard to take it out and put it back on without the clip de attaching from the frame.

For the album I used my Cameo to cut the pages. I used one of the files from 12x12 background frames and just sized it to fit within my frame. I used Recollection's Kraft cardstock for all my pages. Scored it in half using my Martha Stewart Scoring Board. I distressed all the edges with Vintage Photo Distress ink.  For the layering pattern paper I cut the same shape slightly smaller out of Kraft and then I layered them over the pattern paper and cut them by hand. That way I could control which way the design is facing and reserve the paper also. 90% of my pattern paper and embellishments I got from my Studio Calico kits: Handmade, Thimble, and Pin Cushion

For the cover I hand made the Rosettes using my Martha Steward scoring board and the valley and hill technique using various withs and lengths of pattern paper to achieve the different sizes. The leaves are white Prima mulberry leaves I sprayed with Olive Vine Glimmer Mist.  The photos were all edited to 2.5x2.5.

Inside Pages:


Now to pack this up and send it off to My husband's Grandma as a birthday gift.

Thanks for stopping by:
Yar!tza

Wednesday, January 18, 2012

12x12 Layout share

I completely forgot to share this layout. It's one of my favorites I've completed this year.


There are so many different layers. I hope I can explain it and make sense. For the layout I used October Afternoon's Modern Homemaker 8x8 Paper Pad. I started with a 12x12 piece of cardstock.  I cut the house from the Paper pad. Once the house was popped up I cut a 4 fences using Martha Stewarts Iron Fence deep edge punch. I trimmed the bats off and double layered them with a pop dot in between. Glued it down. Then I took some crafting moss and did a think layer going all the way across the fences and on the window planters.  Next I took 4 Petal Caps from Bottle cap Inc., punched all of our faces using Fiskars Medium Round 'n Round squeeze punch, added four 1 inch epoxy dots to the top of the photos and then adhered them in the center of the petal cap using a double layer of pop dots. I then started to layer mini roses from Recollections and Prima around them. Added some white Prima leaves through out which I stained with Tattered Angels Olive Vine Glimmer Mist. Punched a few butterflies out of the same paper pad with Martha Stewarts 3-in-1 classic butterfly punch and layered them over the flowers. For the Window planters I took lose flower petals and folded them until the resemble flower buds. For the sky I punched a few clouds out of the same paper pad with Fiskars Extra Large, Large and Medium Cloud Squeeze Punch.  The Plane is a EK Success medium punch. I tied a banner with Lemon Divine Twine. The banner itself was just created by me cutting a strip of cardstock and then making the angled cut at the end. For our last name, date and hearts coming out of the fire place I used Martha Stewarts Numbers Large Punch and Alphabet Punch Set.  That's it for that layout. WOW! That was a lot.

Thanks for stopping by:
Yar!tza

Sunday, April 10, 2011

Mom's Love 12x12 Layout featuring Pink Paislee

Hello everyone,
Today I have a video to share with you.  I filmed myself making this whole layout.  It will be played in fast motion. It's the first time editing a video like this so I hope it looks good.  My husband even did the music for it in Garage Band. He did so good.
Layout: 

Video:

Supplies used:
Pink Paisley: Daily Junque Wood Alphabet, Butterfly Garden 6x6 paper pack, Butterfly Collection Wooden Shapes and Artisan Elements Circles
Heidi Swapp: Invisibles Lovely Grid and Edge Distresser
Making Memories: Scrapbook Colors Cornflower, Tag Maker kit and Slice Tagmaker Rims Tag
Ranger: Alcohol Ink Fillable Pen with Stream Alcohol ink, Distress stains in Antique lien, Spun Sugar and Walnut Stain, Distress ink in Peeled Paint and Vintage Photo
Tim Holtz: Texture Hammer
Provo Craft: Ornamental Iron Cricut Cartridge, GypsyCricut Expression and Cuttlebug
Prima: Mulberry White leaves
Recollections: Boutique Fleur Floral Embellishments and Mini paper Roses
May Arts: Leaves Ribbon
Spellbinders: Nestabilities Labels Four
Queen & Co.: Grass Green Pearls
Deco Art: Weathered Wood Crackling Medium
Xyron: 9" Creative Station 
Tattered Angels: Olive Vine Glimmer Mist
3m: ATG Gun 
We R Memory Keepers: Corner Chomper
Misc.: Velvet Ribbon, Clay flowers and hot glue gun

Sunday, March 13, 2011

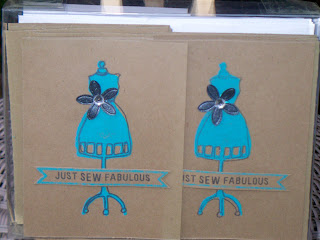
Card Gift Box

Hello everyone,
I find myself struggling to come up with gift when I need them. So I decided that I'm going to start making a few at a time to keep on hand for when I need them.

Here is my finished project:


 In the video I will show you how I created the cards and walk you though the completed gift box.


Supplies:
Claudine Hellmuth: Creative Layers Domestic stamp set
Sizzix: Bigz Pro shot Box and Lid die set
Papertrey Ink: Double-Ended Banner die & Banner Builder Stamp
Hero Arts: Sew Stylish Stamp
Unity Stamp Co: Material Girl Stamp
Stamping Bella: Sew What's new?
Clearsnap: Colorbox Fluid Chalk Inkpad Charcoal
Anita's Craft Ink: Island Green
Prima: Lace
Marta Stewart: Scoring board & Cornice Edge Punch
Michaels: Studio 18 Gems, Misc. Feather & Recollections Kraft Cardstock
Brides Confetti: Silver Flower table Confetti

Provo Craft: Terrifically Tacky Tape Sheets
Scor Pal: Scor Tape 1/4 inch wide
3M: Pink ATG
Tattered Angels: Dazzling Diamonds
Grafix: 12x12 .007 plastic sheets
Joanns.com: A2 Envelopes 

Thanks for stopping by:
Yar!tza

Wednesday, March 9, 2011

Card to share

I've had this idea in my head for such a long time. I was obsessed with it when I saw all these stamps and cricut cartridge. Saved my pennies and I was able to get all the supplies together to make this one card. Yes one card!! I had to make this one card!

Here is the inside of it: I had to color in the image and then figure out the dimensions of the card based on the final size of the image. Honestly I don't even remember what the final dimension of the card is. I though I had it all figured out and then I had to start over cause I was an inch off.  A whole inch.  Math has never been my strong subject.


Breakdown and supplies:
Fist I stamped C.C.Designs Sweet November Lilliane stamp with Memento Dew Drop Tuxedo Black ink. Covered her with a stamped mask made out of Inkadinkado's stamping mask paper.  Used my Stamp-a-ma-jig to help me line up Magnolia's Castle background stamp.  Colored the whole scenery with my Copics and highlighted certain areas with my atyou spica pens all of that done on Cryogen white cardstock. I distressed the edges with Pumice Stone and Vintage Paper distress ink. Cut panels out of Graphic 45 Steampunk Debutante 8x8 paper pad to cover the flaps on both sides.  On each panel I took the biggest rose and covered it with Rock Candy Distress Stickles.

Here is the front:


Breakdown and supplies:
I cut two panels out of the B side of the same patterned paper I used for the inside of the card. Used my Cricut Expression and the Ornamental Iron cartridge to cut the two gates out of  DCWV The Metallic Stack.  I used May Arts 1 1/2 inch silk ribbon which I cut in half and then colored with my Copics to match. I attached the ribbon with 1/4 inch Scor tape to the card base all the way around so the ribbon would not fall off when opened.  On the corner I die cut two small gears using Tim Holtz's Sizzix Bigz die Gadget Gears with black mat board and some left overs of the patterned paper, sprayed with Dazzling Diamonds Glimmer mist. Some Recollection's Mini Roses that were toned with Copics to match and sprayed with Dazzling Diamond Glimmer Mist, two white Prima leaves sprayed with Olive Vine Glimmer Mist and some Recollections bling finish off the card.

Copic colors:
B21
BG13, BG15, BG18
C00
E000, E00, E11, E25, E27, E95, E97, E99
G94, G99
T1, T3, T5, T7
R2O
YR05, YR07, YR09
Colorless Blender
atyou spica:
Orange
Turquoise
Silver
Multilner .05

That's it for today. Thanks for stopping by :
Yar!tza